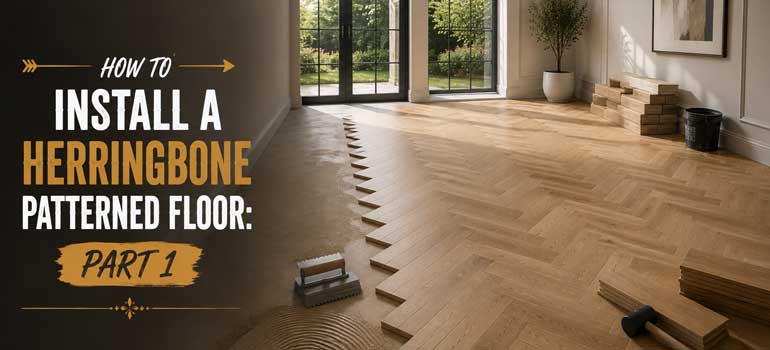
Herringbone is one of the most striking patterns you can put underfoot, and it's also one of the more demanding to fit correctly. Even confident, experienced DIYers often find it more involved than expected, since a small error in the early layout stages compounds visibly by the time you reach the far wall. This first part covers preparation and layout, the groundwork that everything else depends on. Part two of this series covers the actual installation of the boards.
What you'll need
Before starting, it's worth having the right tools and materials on hand rather than stopping partway through:
- A router, for creating grooves in freshly cut board ends
- A sanding block, or a sander if you're experienced with one, for bevelling
- A staining pen, to match new bevels to the factory finish
- Chalk and a chalk line, for marking your guide lines
- Trammel points and a long, straight piece of hardwood flooring
- Scrap flooring, to build a stopper template for consistent cuts
- Standard measuring and marking tools: a tape measure, square and pencil
Step 1: Cut the boards to length
Every piece needs to be cut to the same length, and that length needs to be a multiple of the board's width for the herringbone geometry to work correctly. Typical herringbone boards run around 5 inches wide by 30 inches long, though current projects increasingly favour a larger scale than the smaller traditional blocks of the past, so check your specific product's recommended proportions before cutting.
Step 2: Set up a cutting template
Rather than measuring each board individually, screw a piece of scrap flooring to your work surface as a stopper. Every board then gets pushed against the same fixed point before cutting, which keeps every length consistent without repeated measuring. Check periodically that the stopper hasn't shifted, since even a small drift here throws off every board cut after it.
Step 3: Route the ends
Freshly cut board ends won't have the factory-made groove that the rest of the board has, so you'll need to create one yourself with a router. Use an unfitted, factory-finished piece of the same flooring as a reference, setting the router to match the depth and profile of the existing groove exactly, so the new groove lines up properly with adjoining boards once fitted.
Step 4: Bevel the ends
Factory flooring typically has a micro-bevel along all four edges, and your freshly cut ends need the same treatment to blend in. This is done by hand with a sanding block, or with a sander if you're experienced enough to control it precisely. Once the bevel is cut, use a staining pen to colour-match it to the rest of the board, since a bare bevel will otherwise stand out clearly once the floor is finished.
Step 5: Find the centre of the room
Measure and mark the centre point of the room from both directions, then use a chalk line to mark a clear guide line across those points. Keep this line crisp and unsmudged, since every subsequent measurement in the layout works from it.
Step 6: Establish a true perpendicular line with trammel points
This step is what actually makes the herringbone pattern read correctly once it's laid, so it's worth taking slowly. Using trammel points and a long, straight piece of hardwood flooring:
- Separate the trammel points a few feet apart and mark an equal distance on both sides of the centre point
- Extend the trammel points further out as needed once you reach the end of the board
- Place the points on your marks and draw an arc where the two curves intersect, on both sides of the centre line
- Chalk a line through the points where the arcs cross, which gives you a genuinely true perpendicular line rather than an approximate one
Done correctly, all of these lines meet precisely at the room's centre point, which is what lets the herringbone pattern's four triangular sections align properly once boards start going down.
Step 7: Mark the border lines
Every room needs an expansion gap left around its perimeter, and it's worth deciding on any border detailing at this stage too, a different board width framing the main pattern is a common choice, five boards' width being a typical example. Measure these border lines out from your centre lines rather than from the walls themselves, since most rooms aren't perfectly square and working from the walls would throw the whole layout off.
With the layout marked out, you're ready to move on to actually laying the boards, which part two of this guide covers in full. If this all sounds like more precision than you'd like to take on yourself, that's a completely reasonable conclusion to reach. Our parquet floor fitting team fits herringbone professionally across London, and our guide to what to look for in a flooring contractor covers what separates a reliable fitter from a rushed job. Get in touch for a free quote whenever you're ready.
Frequently asked questions
Do I need trammel points specifically, or can I use another method to find a true perpendicular line? Trammel points are the standard method because they produce a genuinely accurate right angle rather than an approximation, which matters enormously for how clean the finished pattern looks. A large builder's square can work for a small area, but it's less reliable across the full width of a room.
What happens if my centre line is slightly off? Even a small error compounds as the pattern extends across the room, becoming far more visible by the time you reach the far wall than it was at the starting point. This is exactly why it's worth taking the layout stage slowly rather than rushing to start laying boards.
Can I skip the border line and lay herringbone right up to the wall? No, an expansion gap around the room's perimeter is essential regardless of pattern, to allow the wood room to move with seasonal humidity changes. Skipping it risks the floor buckling or the boards pushing against the walls as they expand.
Is engineered wood herringbone easier to install than solid wood? Yes, considerably. Engineered boards typically arrive with the pattern already accounted for and a factory finish applied, which removes much of the cutting, routing and bevelling covered in this guide. Our herringbone wood floor pattern page covers engineered versus solid construction in more detail.
How long does the preparation stage typically take before installation can begin? It varies with room size and how experienced you are with the tools involved, but it's realistic to expect this layout stage to take a full day or more for an average room. Rushing it is where most DIY herringbone projects run into visible problems later.